By Wade Sheldon, Tulalip News
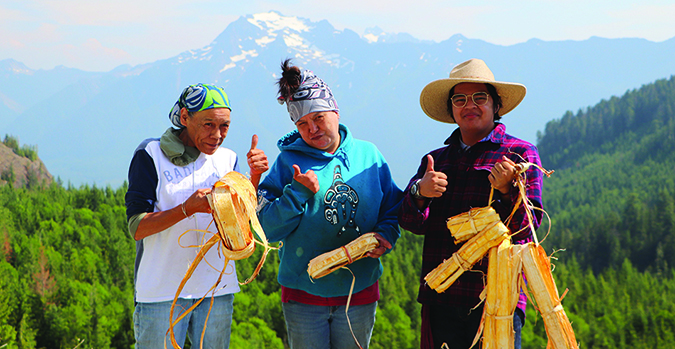
Under the radiance of a resplendent Monday morning, Jamie Sheldon, a proud Tulalip native and skilled basket weaver, took off to the mountains. She was accompanied by her dear friend, fellow tribal weaver, Wilma Gloria, along with her beloved granddaughter Maddie. This would be the first of two journeys to the mountains for Jamie. With the car packed, they headed east of Tulalip to the Cascade Mountains to search for some red cedar to harvest for their many pieces of traditional styled baskets, jewelry, and headwear.
“The best time for harvesting red cedar is from the middle of May to the end of June,” Jamie said. “And the best time to harvest yellow cedar is right after red from the beginning of July to the beginning or middle of August depending on the rise in temperature.”
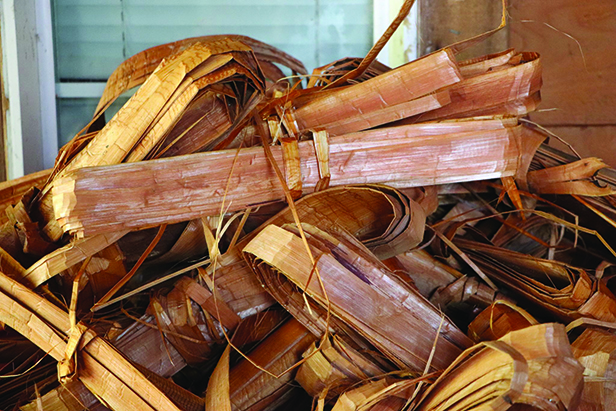
Red cedar has an earlier harvest time as most grow lower in elevation and warm up faster. This causes the sap to separate the inner bark from the outer bark, making it easier to pull strips of bark from the trees. When you cut a piece of bark loose from the tree, then grab it and separate it from the tree, this is called pulling.
“When harvesting cedar, [we] pray and thank the cedar for providing a chance at keeping the native culture alive. It gives us a source for revenue and is very valuable to the Native people,” said Jamie, “You never want to pull all the cedar as it could kill the tree. Pulling one to three strips of cedar, depending on the size and health of the tree is all you need; while also leaving enough protection for the tree to heal itself.”

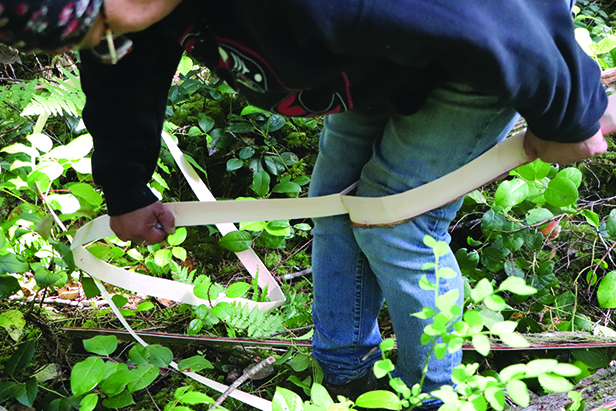
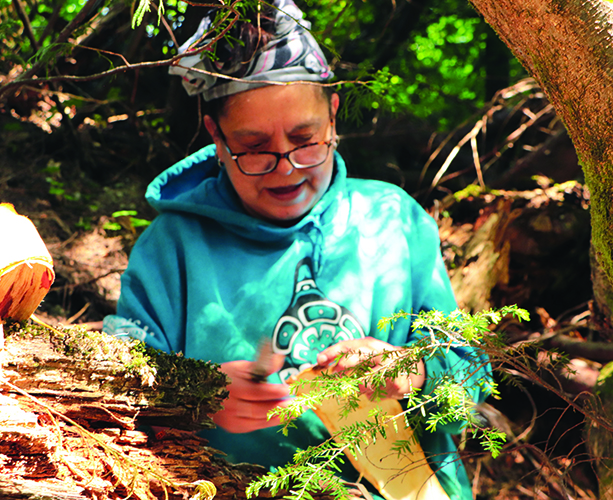
You also want to remember that each strip you pull should only be the width of your palm. After pulling a strip of bark from the tree you need to separate the outer bark from the inner. This can be done with a knife by pushing it through the side of the bark, splitting it, then pulling the two pieces away from each other. Using your knees for leverage can help. When done separating the excess pieces of bark you don’t use, put them under the roots of the tree or buried next to the tree so the micro-organisms from the bark breaking down can go back into the soil to nourish the tree.
Often times, driving down long gravel roads is how many scour the forests for trees to harvest. The forest rangers would like the people who are harvesting cedar to pull from the opposite side that isn’t facing the road. This is to help keep the forests looking well, while also not letting people know that this is a harvesting area so it can recover and isn’t over harvested. You only want to harvest one to two trees in any area so as to keep the forest healthy.
On her second expedition, Jamie was accompanied by Kaiser Moses, another Tulalip native and cedar weaver. Also joining them again was Jamie’s friend Wilma. The pursuit of yellow cedar proved to be an adventurous undertaking. One that demanded greater patience and a touch more agility, making it a lengthier endeavor than the previous trip.

“Looking for yellow cedars can take a whole day’s journey, if you’re lucky,” Jamie said with a smile. “A place where yellow cedars grow can be very sacred to a basket weaver, as it is more difficult to find and attain.” Yellow cedars require a bit more patience, and knowing where to go and what to look for are big factors in locating the right trees.
When looking for yellow cedar, it’s best to start higher in elevation, as yellow cedars grow from around 2,000 to 5,000 feet. They are often located on very steep inclines making pulling, stripping, and gathering quite the task. Yellow cedars can also be tricky as they resemble red cedars. Here are a couple tell-tale signs to look for when locating yellow cedar.
The first thing to note is that the branches are a lot droopier and aren’t parallel to each other. Many of the branches are bendy and the leaves hang down toward the ground. The bark is also very different as you can grab the outside bark and peel it off fairly easily. When you pull yellow cedar, as it dries and becomes more yellow, it can take a little longer than red cedar to dry.
After gathering your cedar there are a few important steps to ensure it stays clean and free from mold and other elements that may damage your cedar, like moisture or sunlight.
“Right when you get home from harvesting, it is of the upmost importance that you hang your cedar,” said tribal weaver, Anita Sheldon. “You want your cedar to be completely dry before storing it. When storing it, you must make sure it is in a dry area, using a container with a lid and putting a jar or cup of open baking soda to help trap any moisture that may get into your area or container.”
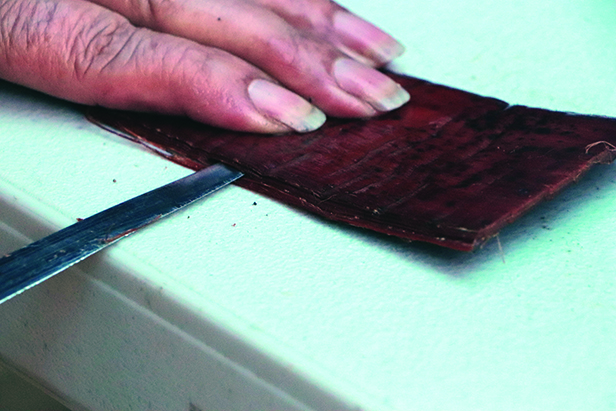
When you feel like you want to use your cedar, you must soak it until it becomes flexible. This could take a couple of days so prepare beforehand if you have a need or want to create something. Depending on the size and item you are creating, each piece of cedar can be separated multiple times to create the desired width you want your creation to be.
Anita shared, “Knowing what our ancestors did, and the many uses cedar had, for everything from cooking to diapers for the baby. For their bedding and enclosures for their rooms in the longhouse, shawls, skirts, men used them for pants and hats. Cedar was a way of living for all our ancestors, and it’s a beautiful material to work with.”
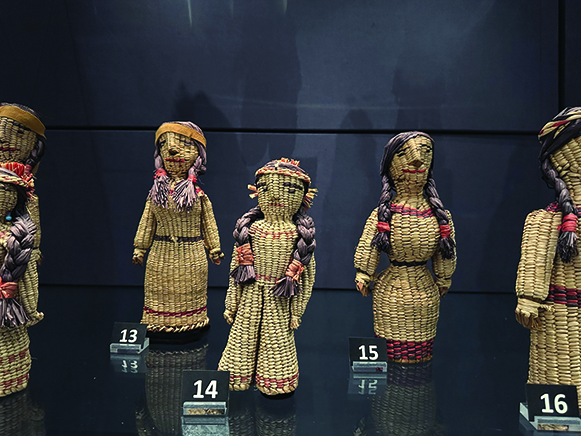
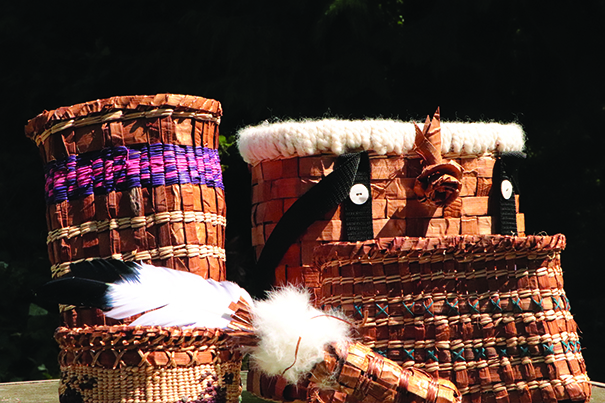
Traditionally, cedar has been used for a wide variety of items, such as water tight baskets, baskets for berry picking, or even catching fish, clothing, and dolls for children to play with. Cedar is sacred to the Coast Salish people and continues be used in many ways, keeping the sacred traditions alive and going strong.
“It’s very important to harvest cedar, because it is a cultural activity,” expressed Kaiser. “Anytime something is cultural, it helps me heal from the stresses of life. It also helps me stay grounded to the earth and stay happy. I keep the cedar in a sacred place. When it’s ready, I am going to use the cedar for traditional regalia pieces to gift to my family.”
If you want to learn more about cedar harvesting, creating cedar baskets, and jewelry, Jamie teaches classes on Wednesdays, 5:00-7:00 p.m. at the Hibulb Cultural Center. For more info, visit hibulbculturalcenter.org.