5 Ways to Make Gardening With Kids Easy and Educational

Darla AntoineDarla Antoine's son Cuen holds a basket of strawberries he helped pick.
Darla Antoine
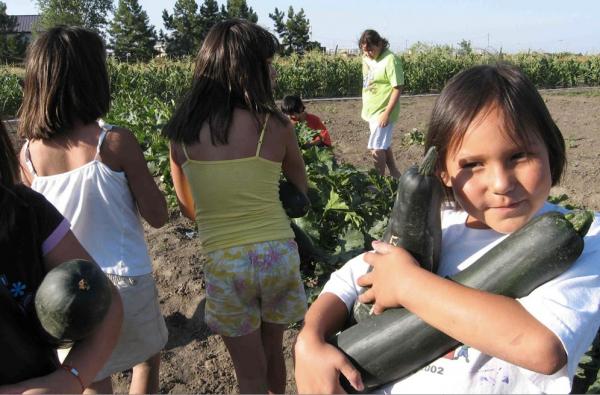
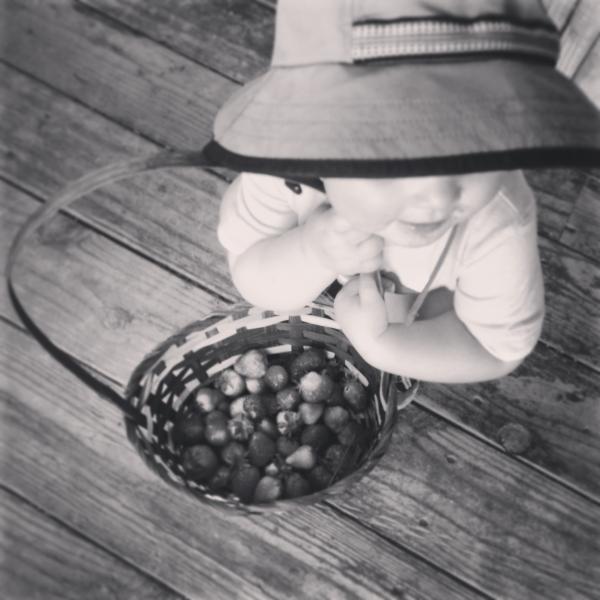
Darla Antoine’s son Cuen holds a basket of strawberries he helped pick.


Darla Antoine, Indian Country Today


It’s no secret that kids who help plant a garden are more likely to want to eat the fruits and vegetables that it produces—and growing a garden is a great way to get your kids interested in trying unfamiliar foods.

RELATED: 5 Easy Steps: How to Start a Community Garden

Whether you’re thinking of spearheading a school garden, you’ve got a plot in the community garden or you’re blessed to have a couple of raised beds in your own back yard, here are five tips for making gardening fun, easy and rewarding for your little ones:

1. Center the Garden on the Kids

Involve the kids in deciding what to plant and where to plant it. Use this as an opportunity to teach them about the balance between sunlight and shade, and even to help them learn to track to the path of the sun. You could even experiment and plant the same kind of plant or seed in three different locations with varying access to sunlight and water. Ask your children to observe the differences in the plants as they grow.

2. Designate a Specific Area for Their Gardening

If you’ve got your own ambitions for gardening it would be wise to designate a special bed or section of a bed specifically for the children to garden. This will keep them from over “helping” you and encourage them to take ownership over their own space. It may be a good idea to buy them their own gardening tools as well. Even simple plastic tools for playing in the sand could work well in a kiddie garden.

3. Make the Garden Interactive

Plant flowers that attract butterflies and hummingbirds and perhaps even encourage a cutting garden so that the kids can touch and smell the flowers. Release ladybugs into the garden and track their life cycle. Take photos of a favorite plant or vegetable once a week to track its growth. My favorite idea? Plant a sunflower house. Simply plant sunflower seeds or starts in a large circle, leaving enough space between two of the sunflowers for children to easily pass through without damaging the flowers. By the end of the summer the sunflowers will have grown up into a large round “house” with a gaping door—a perfectly shaded playhouse for the dog days of summer.

4. Keep it Simple

Your kids are likely to be more interested in the garden if they begin to see results sooner rather than later. Be sure to plant vegetables that grow quickly, like radishes, alongside more tantalizing varieties that will prove to be worth the wait, such as cherry tomatoes or sweet peas. Forgo seeds for starts to speed the “fruits of our labor” process up a bit more and don’t forget to plant herbs, which are ready to eat almost immediately.

5. Don’t Stop at the Garden

Use the garden as a resource and an excuse to get your kids in the kitchen all summer long too. Teach them how to cook and prepare delicious meals with the vegetables and herbs that they grew—even set the dinner table with a bouquet of fresh flowers from the garden as well. Begin to teach them delicious and simple food pairings, like fresh basil with tomato. If they’re old enough challenge them to find a new recipe once a week, whether they scour the web, your cookbooks or their imagination.

Happy Gardening!

Darla Antoine is an enrolled member of the Okanagan Indian Band in British Columbia and grew up in Eastern Washington State. For three years, she worked as a newspaper reporter in the Midwest, reporting on issues relevant to the Native and Hispanic communities, and most recently served as a producer for Native America Calling. In 2011, she moved to Costa Rica, where she currently lives with her husband and their infant son. She lives on an organic and sustainable farm in the “cloud forest”—the highlands of Costa Rica, 9,000 feet above sea level. Due to the high elevation, the conditions for farming and gardening are similar to that of the Pacific Northwest—cold and rainy for most of the year with a short growing season. Antoine has an herb garden, green house, a bee hive, cows, a goat, and two trout ponds stocked with hundreds of rainbow trout.


Read more at http://indiancountrytodaymedianetwork.com/2014/06/23/5-ways-make-gardening-kids-easy-and-educational-155354

23 Ways to Improve Your BBQ


istock
istock

May 22, 2014 | By Pamela Nisevich Bede, M.S., R.D.

Sure, your backyard barbeque is meant to be a party, but that’s no excuse to offer foods that will ensure you’ll avoid stepping onto the beach — and the scale. In fact, every BBQ has room for a few entrees and sides that keep your health-conscious guests happy, and your body looking and feeling good. Try the following tips and you are sure to wow your guests and keep them asking for more — without them ever knowing they were “indulging” in healthier options.

See all 23 tips here, at Livestrong.com

Fruitful Container Gardens


Strawberries in a potPhoto: Gardener’s Supply Company
Strawberries in a pot
Photo: Gardener’s Supply Company


By Melinda Myers

Picture yourself harvesting a few fresh strawberries for your cereal in the morning or perhaps picking a few apples from your own backyard tree to cook up into a pie.  It is possible, even if you garden on a balcony or small lot. And even if you have plenty of space, you will still appreciate the fun and convenience of reaching out the backdoor and harvesting some homegrown fruit.

Strawberries are excellent container plants. Grow everbearing or day neutral varieties, so you will be harvesting strawberries throughout the growing season. Reduce your workload and increase success with a self-watering hanging basket (gardeners.com).  Or dress things up a bit more with a decorative container.  The haystack hanging baskets have the beauty of the coco fiber lined planters, but require half the watering. The AquaSav™ liner is a combination of coir and recycled plastic designed to conserve moisture. This means better results with less watering.

But don’t stop there. Add some dwarf fruit trees to your patio plantings. A dwarf apple, peach or pear will provide beautiful spring flowers, nice foliage for the summer and fruit for you to enjoy. Select self-fertile varieties, those that only require one plant to produce fruit, if space is limited. Grow your dwarf trees in large weather-proof pots with drainage. Those in cold climates will need to provide some winter protection, but the first harvest will make that extra bit of work well worth the effort.

Or try your green thumb at growing lemons, limes and other citrus in a container. The fragrant flowers and glossy green leaves are a beautiful prelude to the tasty fruit. Even cold weather gardeners can put their green thumb to the test by growing a Meyer lemon, Kaffir lime or other citrus in a container.  Just move the potted plant indoors for the winter and back outdoors next season once the danger of frost has passed.

And don’t forget the blueberries that are high in antioxidants and flavor.  These nutritious beauties require moist well-drained acidic soil. Something most gardeners do not have. This makes growing them in containers, where you control the soil, a good option. Blueberries provide seasonal interest with their nodding white bell-shaped flowers in spring, colorful fruit in summer and yellow, orange or red color in fall.  Though only one plant is needed to bear fruit, keep in mind that your harvest will more than double if you grow two.  


So survey your patio, deck, balcony or garden for space to add a container or two of fruiting plants that are sure to add beauty and flavor to your garden and meals this season.

Gardening expert, TV/radio host, author & columnist Melinda Myers has more than 30 years of horticulture experience and has written over 20 gardening books, including Can’t Miss Small Space Gardening and the Midwest Gardener’s Handbook. She hosts The Great Courses “How to Grow Anything” DVD series and the nationally syndicated Melinda’s Garden Moment segments. Myers is also a columnist and contributing editor for Birds & Blooms magazine. Myers’ web site, www.melindamyers.com, offers gardening videos and tips.

Green and Sustainable Living-NBSM Week 4


week-4By Monica Brow, Tulalip News Writer

Tulalip, WA-The final week of National Building Safety Month is all about creating and maintaining an energy efficient home. General electric has developed an online test that can be used to estimate the carbon footprint for each household and points out what levels you are at compared to the national average. This useful tool will give you an idea of where to begin when creating a more energy efficient home.

The usual and more common energy efficient methods that, if you haven’t already implemented one more you should do so, will save you money on water and electric bills along with helping out the environment. They include fitting your home with energy efficient doors and windows, proper home insulation, installing low flow toilets and shower heads, using LED or florescent light bulbs, and energy star appliances.

Some of the less common techniques aim toward sustainability through recycling. They include lessening garbage waste by recycling and saving kitchen scraps for garden composting. Install a rain water barrel to catch water for gardening. Use a manual lawn mower instead of electric or gas powered will save money and provide a workout. When building or renovating a home, find reclaimed building materials instead of buying new; this adds a uniqueness that isn’t mass produced and can be cost saving.

Carbon foot print calculator http://www.ge.com/ivillage/calculator/

For NBSM handout material or questions contact Orlando Raez of the Tulalip Tribes Community Development at 360-716-4214

10 tips for green and sustainable building

Heating and cooling uses more energy and drains more energy dollars than any other system in the home. Approximately 43% of utility bills cover heating and cooling.

Close curtains and shades at night to keep warmth in and keep them open during the day.

Try new lighting control technologies like motion-sensitive or timed off switch lighting. Using these new options can reduce lighting use by 50% – 75% and save the lighting portion of energy bills that account for 11% of overall household energy consumption.

Replace ordinary light bulbs with Compact Flurosent Light (CFL) bulbs. If every household replaced just one light bulb with a CFL bulb, America could save enough energy to light nearly three million homes.

Install a programmable thermostat to keep your home comfortably warm in the winter and comfortably cool in the summer.

Replacing windows can save between 7% and 24% of the household heating and air-conditioning costs.

Plug home electronics, such as TVs and DVD players, into power strips, and turn the power strips off when the equipment is not in use as TVs and DVDs in standby mode still consume several watts of power.

Choosing energy-efficient products can save families approximately $400 a year while reducing greenhouse gas emissions. Chose ENERGY STAR certified products when you buy or replace household appliances.

In the workplace, buy and use ENERGY STAR labeled office equipment, and other products. Be sure that the “stand-by mode” function is activated as this automatic “sleep mode” saves energy and money when the equipment is not in use.

Regularly change the filters in the heating and cooling system of your home or office as dirty filters can cost up to $5 a month extra, overwork the equipment and result in dirtier indoor air.

Consider purchasing “electrostatic” filters, which are washable, long lasting, and provide cleaner air. Clean or change filters more often if smokers or pollution sources are present.

Backyard Safety-NBSM Week 3


week-3_imageBy Monica Brown, Tulalip News Writer

Tulalip,WA-The Farmer’s Almanac is predicting a dryer and warmer summer than usual for the northwest area. With the days heating up people will be heading out side to cool off and for that reason week 3 of National Building Safety Month focuses on backyard safety when using decks, pools and outdoor barbeques.

Inspect your deck, swing sets, playhouses or other yard structures to confirm that they are secure and in good shape. Keep either a fire extinguisher or hose on hand when cooking on a BBQ. Most importantly, learn to perform CPR/First Aid.  According to a study by the Center for Disease Control, drowning is the leading cause of unintentional injury death worldwide, and the highest rates are among children; reports from 2005 to 2009 show an annual average of 3,880 people died from unintentional drowning in the United States.

CPR/First Aid is a useful skill to know year-round and children as young as 9yrs old can learn to perform CPR effectively. Check with your local fire district, American Red Cross or YMCA for when and where you can attend a CPR/First Aid class.

Another threat  found in pools are recreational water illnesses (RWIs), caused by germs and spread in contaminated water that is swallowed, or by simply having contact with contaminated water such as swimming pools. RWIs cause a variety of infections such as gastrointestinal, skin, ear, respiratory, eye, neurologic, and wound infections. The following RWI’s can be passed through pool water; Cryptosporidium (“Crypto”) causes diarrhea, Giardia also causes diarrhea, Hot Tub Rash causes itching and blisters, Legionella causes a type of pneumonia, after using a public pool area be sure to watch for symptoms.

Chlorine does not kill all germs instantly and can take anywhere from minutes to days for the chlorine to kill them. On the other hand, too many chemicals in the pool can cause eye, nose and breathing irritation. Purchase a test kit for your pool and test the water regularly.

National Building Safety Month information can be found at www.iccsafe.org. NBSM is being hosted by the Tulalip Tribes Community Development Department, for handouts, resources or other information please contact Orlando Raez at 360-716-4214.

10 important tips for Backyard Safety

Pool & Deck safety

Make sure all pedestrian gates in the barrier fence for your pool are self-closing and self-latching. Other gates should be padlocked.

Remove all chairs, tables, large toys or other objects that would allow a child to climb up to reach the gate latch or enable the child to climb over the pool isolation fence.

Reaching and throwing aids like poles should be kept on both sides of the pool. These items should remain stationary and not be misplaced through play activities.

All pool and hot tub drains (suction outlets) must have a cover or grate that meets industry standards for suction fittings marked to indicate compliance with ANSI/ASME A112.19.8 2007. Check to see that these covers are not broken or in disrepair, and that they are anchored firmly over the drain openings.

Install a pool alarm to detect accidental or unauthorized entrance into the water. While the alarm provides an immediate warning, it does not substitute for the barrier fences, door alarms and safety covers required by the code.

Install either an automatic or manually operated, approved safety cover to completely block access to water in the pool, spa or hot tub. Never allow anyone to stand or play on a pool cover.

Check for warning signs of an unsafe deck, including loose or wobbly railings or support beams, missing or loose screws that connect a deck to the house, corrosion, rot and cracks.

Grill Safety

Place the barbeque grill away from siding, deck railings and out from under eaves and overhanging branches. It is also unsafe to use grills in a garage, porch or enclosed area that could trap carbon monoxide. Never grill on top of anything that can catch on fire.

When grilling, have a fire extinguisher, a garden hose or at least 4 gallons of water close by in case of a fire.

Keep children away from fires and grills. Establish a safety zone around the grill and instruct the children to remain outside of the zone. A chalk line works great for this purpose. Never leave the grill unattended.

Preparing for storms and natural disasters-NBSM Week 2


week-2

By Monica Brown, Tulalip New Writer

Tulalip, WA-As we move through the seasons sometimes we experience severe weather that can be exciting to watch but can also cause major property damage and put lives at risk. National Building Safety Month’s week two focuses ways to prepare your family and home for natural disasters such as earthquakes, flooding, wildfires, tornadoes, hurricanes and strong winds.

Tulalip is situated in a highly seismic area. The USGS data estimates there is a 76.62 percent chance of a major earthquake within 50km of Snohomish, within the next 50 years.And, Snohomish county data has found that Snohomish County earthquake activity is just above the Washington State average and is 268 percent greater than the U.S. average overall.

Earthquake Tips

  • Make sure your home is securely anchored to its foundation
  • Strap water heaters, appliances and TVs to wall studs.
  • Anchor bookshelves, heavy furniture, appliances and televisions to wall studs.
  • Secure pictures, mirrors and ornaments to the wall with appropriate fasteners.
  • Know where and how to shut off electricity, gas, and water services.

Washington is one of the more flood-prone states in the nation.  According to the Department of Ecology Washington State, from 1980 to 2011, Washington had 22 Presidentially-declared flood disasters.

Flooding Tips

  • Elevating your home above the base flood elevation (the elevation associated with the “100-year flood”) is the best method of protecting your home, and is a requirement for new homes. Visit flash.org for more information.
  • Wet flood proofing your home allows flood water to flow through the structure. An example of wet flood proofing is installing flood vents that create permanent openings in the foundation.
  • Dry flood proofing your home prevents floodwaters from entering the building. An example of dry flood proofing is installing new brick veneer over asphalt coating and applying polyethylene film over existing walls.

According to the Washington Military Department Emergency management Division, an average of 900 wildfires are started annually throughout Washington state with 70% of them occurring in eastern Washington.

Wildfire Tips

  • Prevent wildfire damage by developing a defensible space in your landscaping by clearing at least 30 feet around your home, or 50 feet around your home if you reside in a heavily wooded area.
  • Plant fire-resistant, native vegetation and remove any dead or dying trees. Properly prune shrubs, and trim tree branches so they don’t extend over a roof or near the chimney. Mow your grass and control the height and spread of ground covering vegetation. Keep plants at least 12 to 18 inches away from the house.
  • When putting on a new patio deck, build from fire-resistant materials. On new and existing decks, create fire barriers around the deck base and clear vegetation at least 100 to 300 feet downhill from the deck base.
  • Install only burning-brand, exposure rated (Class A, B or C) roof assemblies using materials such as asphalt shingles, slate or clay tile or metal roof coverings.

Hurricanes are a tropical storm and most likely will never happen in Washington State, unless there is a major climate shift that places the state in a tropical zone. But, tornadoes and strong winds comparable to hurricane winds can and do happen in Washington. Tornadoes happen once or twice a year in Washington yet have weak winds that are barely strong enough to do much damage. But it is still a good idea to make sure your home, roof and windows can withstand strong winds.

Hurricanes, Tornadoes and Strong Winds Tips

  • The best place to start is with a Do-It-Yourself Wind Inspection (can be found on Flash.org) to find out what is ok with your house and what needs attention.
  • Improve your roof’s resistance to uplift by applying a 1/4 -inch bead of caulk of along the intersection of the roof deck and the roof support element (rafter or truss chord) on both sides with a caulking gun.
  • If your home is not protected by impact-resistant windows and doors or impact-resistant shutters or panels, consider building your own temporary emergency panels.

To help Homeowners weather a severe storm or natural disaster, NBSM suggests that you:

  • Develop a family disaster plan that includes a list of food and water supplies needed for each member of your family and supplies for your pets. Make copies of important documents like insurance policies, the deed to your home, and other personal papers, important phone numbers and a home inventory. Create a checklist of important things to do before, during and after a disaster.
  • Review your evacuation route and emergency shelter locations with your family. Options for evacuation would include staying with friends and relatives, seeking commercial lodging, or staying in a mass care facility operated by disaster relief groups in conjunction with local authorities.
  • Taking shelter is critical in times of disaster. Sheltering in place is appropriate when conditions require that you seek protection in your home, place of employment, or other location where you are when disaster strikes.

Tulalip Community Development has detailed informational handouts that can be picked up at the Tulalip Administration building or contact Orlando Raez at 360-716-4214.

For more information about NBSM or Disaster Preparedness please visit www.iccsafe.org and www.flash.org. All tips from the National Building Safety Month.

10 Important Tips to remember for disaster safety and mitigation

Develop a family action plan and share with everyone in your family, so you will know where to go if an evacuation is called. Review at least two exit routes from your home or neighborhood to a designated meeting place for your family. Plan ahead for your pets as many shelters will not accept them.

Create a disaster supply kit that will allow you to remain in your home after a disaster or for use after evacuating to a safer location. Be sure the necessities in your kit are fresh and restored every six months.

Stay tuned to radio, TV and NOAA Weather Radio for official updates and critical lifesaving weather information. Remember, reception is usually best if placed near a window.

Flooded roads could have significant damage hidden by floodwaters. Never drive through floodwaters or on flooded roads. Do not attempt to cross a flowing stream. It takes only six inches of fast flowing water to sweep you off your feet and two feet of water to move an SUV-sized vehicle.

If you live in a high wind or hurricane prone area and do not have tested and code approved shutters for protection from windborne debris, temporarily protect your doors and windows by mounting exterior grade, 5/8″ minimum thickness plywood and fastening it into place. Visit www.flash.orgfor detailed instructions on how to use plywood for emergency board up.

Secure lawn furniture and any other loose outdoor items that can become windborne and can cause injury or damage during storms with high winds. Don’t forget trash cans, grills, toys and potted plants.

Consider building or retrofitting to create a tornado safe room in your home. Follow ICC/NSSA 500 Standard for detailed construction information and to ensure you achieve the highest level of protection for your family.

Use Surge Protective Devices (SPD) in your home to protect electronic appliances from all but the most severe electrical surges or direct strikes. The devices should be installed to afford the highest level of protection.

In wildfire prone areas, remove fine (dead grass, leaves, etc.) and coarse fuels (dead twigs, branches, etc.) within 30 feet of a building to create a survivable space in case of wildfire. Be sure to remove dry leaf and pine litter from roofs, rain gutters, decks and walkways. Follow ICC’s International Wildland-Urban Interface Code for detailed requirements.

Before a winter storm, insulate all exposed water pipes outside the home. It is important to allow a slow trickle of water to flow during a winter freeze especially if the faucet is on an exterior wall. Remember, wrap and drip your pipes for the ultimate protection in a freeze.

Source: www.iccsafe.org


Fire Safety-NBSM Week 1


week-1By Monica Brown, Tulalip News Writer

Tulalip, WA – May is National Building Safety Month (NBSM) as proclaimed by President Barack Obama in 2013, as a way to “encourage citizens, government agencies, businesses, nonprofits, and other interested groups to join in activities that raise awareness about building safety.”  For NBSM, the month of May is broken down into four weeks and the focus put on a new subject for each week, fire safety, disaster safety, backyard safety and green and sustainable building.

The Tulalip Tribes Community Development department is participating in NBSM and would like to make Tulalip residents aware of the hazards in and around the home as well as tips for prevention and safety. Community Development is providing pamphlet information that can be picked up at the Tulalip administration building for the entire month of May, see below for contact information.

The first week of NBSM is designated for fire safety in and around the home, Keeping Fire in its Place. According to the U.S. Fire Administration, each year throughout the U.S., 17,500 people are injured in fires and over 3,400 Americans perish in fires with about 1/3 of those victims being Senior citizens. A few things to consider during fire safety week are to check your smoke alarms, establish an evacuation plan, and purchase a fire extinguisher. It’s also a good time teaching children about fire safety. Annually, children of all ages set over 35,000 fires (U.S. Fire Administration statistic).

Fire Extinguisher information: There are multiple types of extinguishers used for specific flammable materials and what works for one may not work for another. In case of a fire, please do not rely solely on a extinguishing it yourself; call the fire department as soon as you notice the fire and make sure you can get to safety before trying to extinguish it on your own.

·         Class A extinguishers put out fires in ordinary combustible materials such as cloth, wood, rubber, paper, and many plastics.

·         Class B extinguishers are used on fires involving flammable liquids, such as grease, gasoline, oil, and oil-based paints.

·         Class C extinguishers are suitable for use on fires involving appliances, tools, or other equipment that is electrically energized or plugged in.

·         Class D extinguishers are designed for use on flammable metals and are often specific for the type of metal in question. These are typically found only in factories working with these metals.

·         Class K fire extinguishers are intended for use on fires that involve vegetable oils, animal oils, or fats in cooking appliances. These extinguishers are generally found in commercial kitchens, such as those found in restaurants, cafeterias, and caterers. Class K extinguishers are now finding their way into the residential market for use in the kitchen.

·         Multi-purpose fire extinguishers are also made that combine uses such as class “B-C” or “A-B-C” and can be used on two or more of the above type fires.

Some fire districts in Snohomish County offer free smoke alarm installations and fire extinguisher training. Please contact your fire district to schedule a home smoke alarm installation or fire extinguisher training.

Nearby local fire departments:

Tulalip Bay Fire Department Snohomish Co. Fire District 15, 7812 Water Works Rd Tulalip, WA 98271-9631, 360-659-2416

Marysville Fire District, 1094 Cedar Avenue Marysville, WA 98270, 360-363-8500

For pamphlet information about NBSM contact, Orlando Raez, Tulalip Tribes Community Development, 360-716-4214.


10 Important tips to remember for fire safety and awareness

Put a smoke alarm on every level of your home and outside each sleeping area. Put a smoke alarm inside every bedroom.

Make sure your smoke alarms work. Test your smoke alarms. Push the test button. You will hear a loud noise. If you don’t hear the noise, you need a new battery or a new alarm.

Make sure the smoke alarm always has a good battery. Put a new battery in the alarm every year.

Smoke alarms with long-life batteries will work for up to 10 years. You do not change the battery.

Smoke alarms do not last forever. Get new smoke alarms every 10 years.

Tell your family what to do if they hear the smoke alarm. Make an escape plan so everyone knows how to get out fast. Pick a meeting place outside the home where everyone will meet. Some children and older adults cannot hear the smoke alarm when they are sleeping. Make a plan for how to wake them up. Practice your escape plan with everyone in your family two times each year.

Install home fire sprinklers in your home. Home fire sprinklers and working smoke alarms greatly increase your chance of surviving a fire. Sprinklers are affordable and they can increase your property value and lower your insurance rates.

Portable heaters need their space. Keep anything that can burn at least three feet away.

If you live in an area where homes are located in or close to forests or vegetation areas, you should think about the following safety tips.

Install 1/8 inch or smaller mesh screening that cannot burn on attic/soffit vents and around wood decks to keep out embers. Install spark arrestors on fire place chimneys or wood stove vents.

Keep all items that can burn away from your home. Clean leaves from your gutters. Clear dead leaves and branches from shrubs and trees.

5 Easy Steps: How to Start a Community Garden

Cheyenne River Youth Project (LakotaYouth.org)Guided by traditional and spiritual principles, the Cheyenne River Youth Project® has incorporated the traditional Lakota values of generosity, spirituality, wisdom, respect, courage, honesty and patience into the development of its 2-acre, naturally grown, pesticide-free Winyan Toka Win (“Leading Lady” in the Lakota language) garden.
Cheyenne River Youth Project (LakotaYouth.org)
Guided by traditional and spiritual principles, the Cheyenne River Youth Project® has incorporated the traditional Lakota values of generosity, spirituality, wisdom, respect, courage, honesty and patience into the development of its 2-acre, naturally grown, pesticide-free Winyan Toka Win (“Leading Lady” in the Lakota language) garden.


Darla Antoine, ICTMN


For our ancestors, community gardening was the ONLY form of gardening, but as the landscape of our territories have been whittled away, so has our sense of communal responsibility and communal effort to feed ourselves.

Bringing gardening back to our communities has a number of obvious and not-so-obvious benefits: first, it is a great way to give ourselves dignified access to culturally appropriate foods and it’s a wonderful way to pool resources and strengthen community bonds. That much should be obvious. But did you know that community gardening might also reduce crime rates? One community garden in Philadelphia transformed their neighborhood by revamping and cleaning up an empty lot to house a beautiful community garden. Their efforts had a ripple effect and soon everyone was looking after their property—and their neighbors’—with more care.

And that’s not all: Community gardening gives elders in the community a voice and a chance to share their knowledge while teaching our youth the importance of sustainability and being sovereign—inter-generational exposure of cultural traditions is vital to our communities! Community gardens may also help your community grow traditional foods in a traditional way—something we don’t get from the supermarket.

Spending time in a garden or green space can also help reduce seasonal allergies, stress and air pollution. If built to include a composting station it can also reduce the amount of garbage taken to the landfill every week. And if they are involved in the gardening process, kids (of all ages) are more likely to eat their vegetables.

With all of those benefits, what are you waiting for! Here is how you can start your own community garden in five easy steps:

1. Organize a Meeting

Where will the garden be (find a place with at least 6 hours of sunlight and access to water)? How much are dues? How many plots and what size? What should be planted? Who will be involved? Who will benefit? Is there the possibility of funding or sponsorships to help cover the costs?

2. Form Committees

Who will be in charge of securing funding or collecting dues? Who will buy the seeds? Who will construct the plots? Will there be youth activities or a youth garden? Who will organize the planting and harvesting? Or is it all up to the individual plot owners?

3. Make Rules and Post Them

Involve the community in making the garden rules and the community will follow the rules. When are dues? How will the money be used? Will there be regular meetings? Are individuals responsible for the tending and harvesting of their own plots or is the garden an entire community effort from beginning to end? Will tools be provided to share or is everyone responsible for their own needs? Will the garden be organic?

4. Prepare and Develop Site

Clean the site, create a design or arrangement for the plots, build the garden beds, build a tool shed, and build a compost center. You may want to plant ornamental shrubs around the parameter of the garden to help make the garden look beautiful. You may also have to consider deer fencing or other steps to keep animals out of the garden. Don’t forget to plan pathways in-between all of the plots! Pathways that are able to accommodate wheelbarrows are highly suggested.

What considerations for traditional farming and gardening practices do you need to make? Do you want to honor the ancestors in the design of the garden somehow?

5. Stay in Touch

One of the purposes of a community garden is to strengthen the ties that bond a community. Be sure to create a phone tree, email list and/or put up a bulletin board to help members stay in touch when they need to. Also consider planning monthly workshops aimed at teaching the community how to garden, weed, harvest and maintain pest control without the use of harmful pesticides and herbicides. You can also plan seasonal foraging expeditions for traditional foods– and don’t forget to plan a harvest festival!

Darla Antoine is an enrolled member of the Okanagan Indian Band in British Columbia and grew up in Eastern Washington State. For three years, she worked as a newspaper reporter in the Midwest, reporting on issues relevant to the Native and Hispanic communities, and most recently served as a producer for Native America Calling. In 2011, she moved to Costa Rica, where she currently lives with her husband and their infant son. She lives on an organic and sustainable farm in the “cloud forest”—the highlands of Costa Rica, 9,000 feet above sea level. Due to the high elevation, the conditions for farming and gardening are similar to that of the Pacific Northwest—cold and rainy for most of the year with a short growing season. Antoine has an herb garden, green house, a bee hive, cows, a goat, and two trout ponds stocked with hundreds of rainbow trout.


Read more at http://indiancountrytodaymedianetwork.com/2014/04/07/5-easy-steps-how-start-community-garden-154309

A working garden


Marshall Elementary students were invited to come help plant in the new rain garden. Photo by Valerie Streeter

By Monica Brown Tulalip News

Tulalip, WA -Spring is here and it’s a prime season to put in a rain garden. Imagine your yard with a rain garden that is full of native plants attracting butterflies, hummingbirds and bees. Now envision that same rain garden being low maintenance and capable of preventing flooding or ponding of water in your yard and having the ability to capture pollutants before they reach the Puget Sound.

Rain Garden (2)
Photo by Monica Brown

Recently, Tulalip Natural Resources hosted a three-part workshop, teaching about rain water management and finishing with an actual rain garden installation. Natural resources partnered with Tulalip tribal member Glendy and husband Grant Morrison to install a rain garden at their home creating a hands-on learning experience for the community and the Marshall Elementary Marysville Cooperative Education Partnership.

To begin, the Morrison’s had the utility lines in their yard located, estimated the rain garden size, and created a budget. Because the Morrison’s have a raised garden in their backyard they decided to harvest rain water from the back half of their roof into barrels for summer watering. Rain water from the front half will be routed to flow away from the home’s foundation and into the rain garden.

Photo by Monica Brown
Adding an overflow prevents the water from ponding after flask flooding.            Photo by Monica Brown

There are multiple ways to manage rain water run-off, but the more aesthetically pleasing and environmentally friendly option for homeowners is the addition of a rain garden. From now until 2016 the Puget Sound Rain Garden initiative wants to help install 12,000 rain gardens in the Puget Sound area. The website www.12000raingardens.org, is full of useful information, and local resources along with a place to register your rain garden as part of the initiative to keep the Puget Sound clean.

Tulalip Natural Resources staff is available to help anyone located on the Tulalip reservation with any questions about rain water management and has a free handbook available for pick up. Contact Valerie Streeter of Natural Resources with any questions or for a free Rain Garden Handbook, at 360-716-4629 or by email vstreeter@tulaliptribes-nsn.gov.

Pros of installing a rain garden

Rain Gardens are easy to maintain for years to come since they only require occasional weeding, watering and new mulch every year. If the garden contains native plants they will be easier to care for, cheaper to buy and some attract butterflies, hummingbirds and bees.

Cons of installing a rain garden

Planning and actual installation can take three or 4 weekends. The homeowner will need to create a budget, locate any utility lines on the property and perform a soil test for drainage before you begin. Afterwards, calculate the size and depth of garden for the surface runoff water.


Aerial view of the rain gardenPhoto by Monica Brown
Aerial view of the rain garden
Photo by Monica Brown

Monica Brown mbrown@tulaliptribes-nsn.gov

Greenhouse gardeners begin transplanting crops to aid local food banks

Photo/ Richelle Taylor

by Brandi N. Montreuil, Tulalip News 

TULALIP – Gardeners in training took part in a transplanting extravaganza on Sunday, March 16, at the Hibulb Cultural Center.

A new partnership between the Tulalip Tribes and the Washington State University Snohomish County Master Gardeners Foundation is making it possible for participants to learn the nit and grit of greenhouse gardening.

During Sunday’s event, 40 gardeners of all ages transplanted 75 flats of broccoli, kale, and chard seedlings into larger pots. These seedlings will be part of a crop grown to aid local food banks, such as Tulalip Food Bank, and other Snohomish County Master Gardener food bank gardens.

Tulalip tribal member Gisselo Andrade Jr., helps transplant broccoli that will be harvested for the Tulalip Food Bank during the Greenhouse Gardening class hosted by the Tulalip Tribes and Washington State University Snohomish County Master Gardeners Foundation on March 16, 2014. Photo/ Richelle Taylor
Tulalip tribal member Gisselo Andrade Jr., helps transplant broccoli that will be harvested for the Tulalip Food Bank during the Greenhouse Gardening class hosted by the Tulalip Tribes and Washington State University Snohomish County Master Gardeners Foundation on March 16, 2014.
Photo/ Richelle Taylor

“We all got to know each other more and shared our passion and enthusiasm for gardening,” said Veronica Leahy, Diabetes Educator at the Tulalip Karen I. Fryberg Health Clinic. The gardens began with the clinic’s diabetes management care and prevention education as the ‘Gardening Together as Families’ program. The program expanded through the Rediscovery Program at the Hibulb Cultural Center to incorporate traditional plants and traditional foods

“Even in the rain we were warm and comfortable inside the greenhouse, enjoying each other’s company,” said Leahy.

An additional class was held on Wednesday, March 19, that focused on proper transplanting, water, and sanitization techniques, along with how to seed and label plants, and protecting young plants as they grow.

For more information on ‘Gardening Together as Families’ program at the Hibulb Cultural Center, please contact Veronica Leahy at 360-716-5642 or vleahy@tulaliptribes-nsn.gov.


Brandi N. Montreuil: 360-913-5402; bmontreuil@tulaliptribes-nsn.gov


Photo/ Richelle Taylor


Seventy-five flats of broccoli, kale, and chard seedling were transplanted during the Greenhouse Gardening class hosted by the Tulalip Tribes and the Washington State University Snohomish County Master Gardeners Foundation on March 16, 2014 at the Hibulb Cultural Center. Photo/ Richelle Taylor
Seventy-five flats of broccoli, kale, and chard seedling were transplanted during the Greenhouse Gardening class hosted by the Tulalip Tribes and the Washington State University Snohomish County Master Gardeners Foundation on March 16, 2014 at the Hibulb Cultural Center.
Photo/ Richelle Taylor